Are you looking to install a WordPress theme? As you’re beginning, you should try out few themes on your site until you find the right one that fulfils your needs. In this article, I will provide explain step by step instructions on how to install a WordPress theme for beginners.
Installing a WordPress theme is easy however keep in mind that whenever you activate the new theme, it will change your website looks and functions. So when you are switching from an existing theme, then you should look at our checklist of things you need to do before changing WordPress themes.
There are two ways you can install a theme in WordPress:
- Using WordPress Admin Theme Search
- Using Upload Method from WordPress Admin
Install them Using WordPress Admin Theme Search:
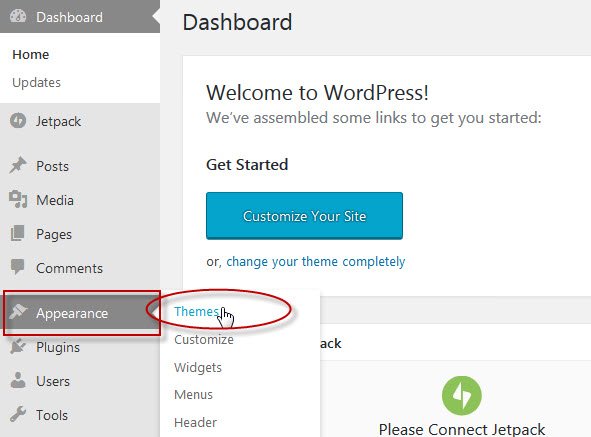
WordPress.org provides tons of free themes. The first thing you need to do is log in to your WordPress admin area. Next, click on Appearance » Themes.
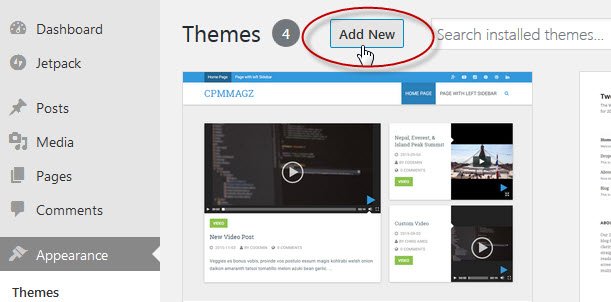
Once you are on the themes page, click on the Add New button at the top.
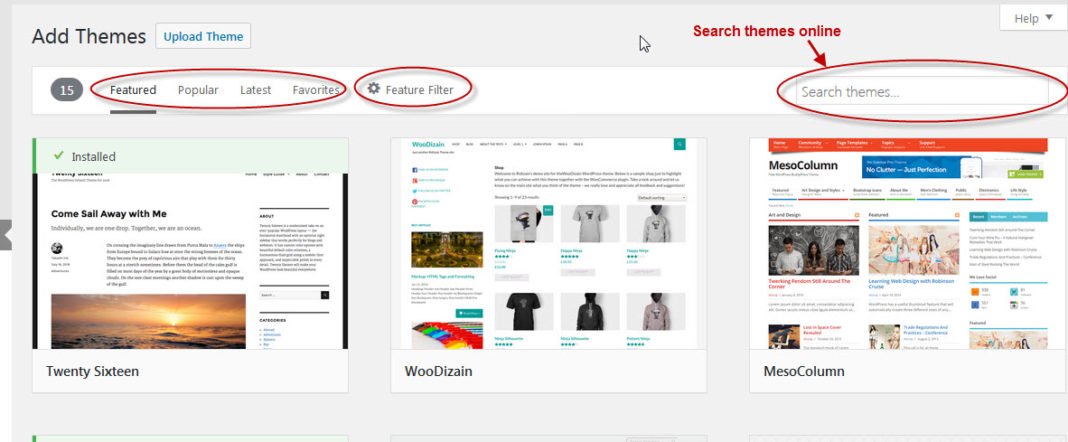
On the next screen, you can select from: Featured WordPress themes, Popular WordPress themes, Latest WordPress themes, search for a specific theme or search for themes with specific features.
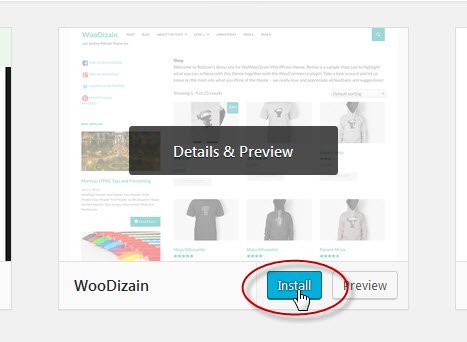
Once you see the suitable theme that you want to install, bring your mouse on top of the image. This will reveal the install button, preview button, and details button. Go ahead and click on the install button.
WordPress will now install your theme and show you a success message along with the link to activate or live preview.
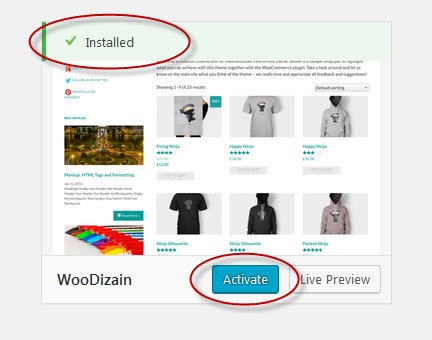
Click on the activate button, and you’ve successfully installed and activated your WordPress theme.
Note: Depending on the theme, it may require additional settings options that you need to configure either through the theme customizer or a separate options panel.
Install a Theme by using Upload Method from WordPress Admin:
The first method we learn allows only free themes that are available on the WordPress.org. But if you want to install a Premium WordPress theme ? in this case, you need to install the theme using the upload method from your WordPress admin.
Start by downloading the .zip file of the theme that you purchased from a marketplace or a commercial theme provider.
Next login to your WordPress admin area and click on Appearance » Themes.
Once you are on the themes page, click on the Add New button at the top.
On the next screen, click on the Upload Theme button at the top.
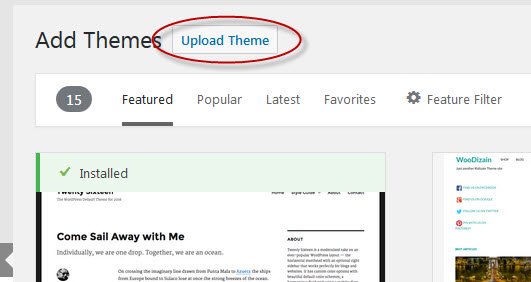
You will be prompted to choose the zip file that you downloaded earlier. Select the file and click Install Now.
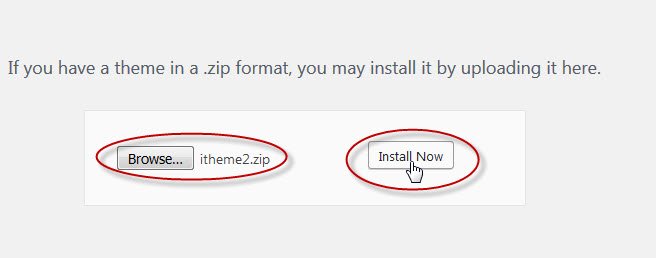
Once your theme is installed, you will see a success message along with the link to activate and preview the theme.
Click on the activate button, and you’ve successfully installed and activated your WordPress theme. Again, depending on the theme, it may add additional settings options that you may need to configure either through the theme customizer or a separate options panel.
The theme upload functionality is only available for self-hosted WordPress.org users. If you’re using WordPress.com, then you will not see this option. To use custom theme upload feature, you would need to use self-hosted WordPress.org
Cheers!!!
